
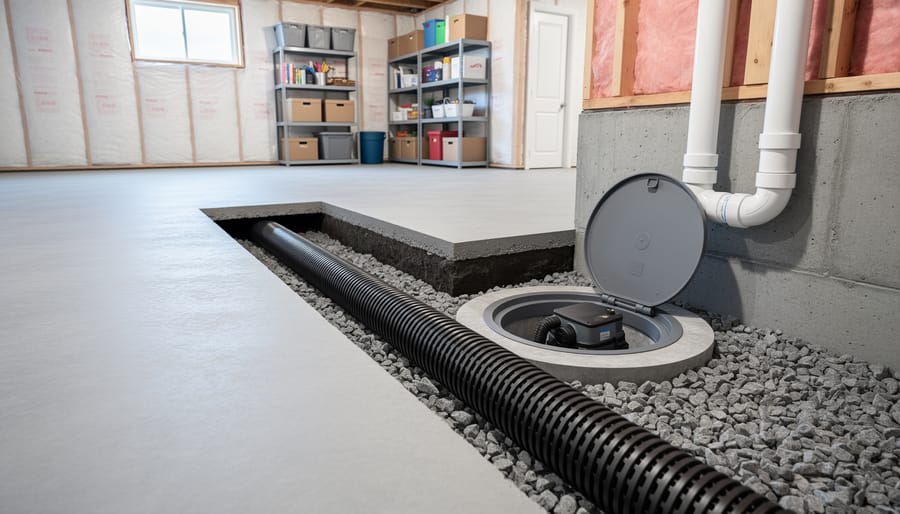
A complete basement water management system combines interior drainage, a sump pump, and discharge piping to intercept groundwater before it damages your foundation or living space. For Ottawa homeowners, this three-part approach addresses our unique challenge of clay-rich soil that holds moisture against foundation walls during spring thaw and summer storms, making interior systems more reliable than exterior-only solutions that can freeze or fail in our climate.
Installing a water management system typically takes two to four days for a professional crew and requires breaking a channel around your basement perimeter, laying perforated drainage pipe in a gravel bed, and connecting it to a sump basin with a reliable pump. While the process sounds invasive, the payoff is substantial. A properly installed system can handle the 50 to 80 millimetres of rain Ottawa receives during peak storm events and protect tens of thousands of dollars in finished basement renovations, stored belongings, and structural integrity.
The real question isn’t whether you need drainage, it’s whether your current setup can handle what Ottawa weather throws at it. Homes built before 1980 often lack any interior drainage, relying instead on exterior weeping tile that has likely collapsed or clogged after decades in our freeze-thaw cycle. Even newer homes sometimes experience failure when builders cut corners on installation or when changing water tables overwhelm undersized systems.
This guide walks you through the complete installation process, from selecting the right pipe diameter for Ottawa’s soil conditions to ensuring your discharge line won’t create ice dams in January. You’ll learn which local suppliers stock commercial-grade components, when to call in professional help, and how to verify your system works before the next heavy rain tests it.
What You’ll Need: Tools and Materials
Installing a basement water management system requires careful preparation and the right equipment. Here’s everything you’ll need to complete the project, organized by category to help you gather materials efficiently.
Essential Materials
Your drainage system starts with a quality sump pump (expect $200, $600 depending on horsepower and backup features). You’ll need roughly 60-80 feet of 4-inch perforated drain pipe for a typical Ottawa basement, plus solid PVC pipe for the discharge line. Plan on 2-3 cubic yards of clean ¾-inch gravel for the drainage trench, and a pre-formed sump basin that holds at least 18 gallons. For waterproofing, budget for rubberized membrane sheets or liquid-applied sealant to cover the lower foundation walls, plus hydraulic cement for patching cracks.
Tools and Equipment
- Heavy-duty jackhammer or demolition hammer for breaking concrete (available for rent at $60, $80 per day from Home Depot on Merivale or United Rentals)
- Wheelbarrow and several 5-gallon buckets for removing debris
- Circular saw with concrete blade and reciprocating saw
- Laser level or 4-foot spirit level for ensuring proper drainage slope
- Shovel, pick, and tamper for excavation work
- Drill with masonry bits and PVC cement for connections
- Safety equipment: steel-toed boots, heavy gloves, safety glasses, dust mask, and knee pads
Ottawa residents can source most materials from Home Depot, Lowe’s, or Rona locations throughout the city. For specialized waterproofing products, check Ness Concrete in Nepean or BMR in Kanata. Total material costs typically range from $1,200, $2,500 for an average-sized basement, not including tool rentals. Keep receipts for potential warranty claims and future property disclosures.
Safety Precautions and When to Call a Professional
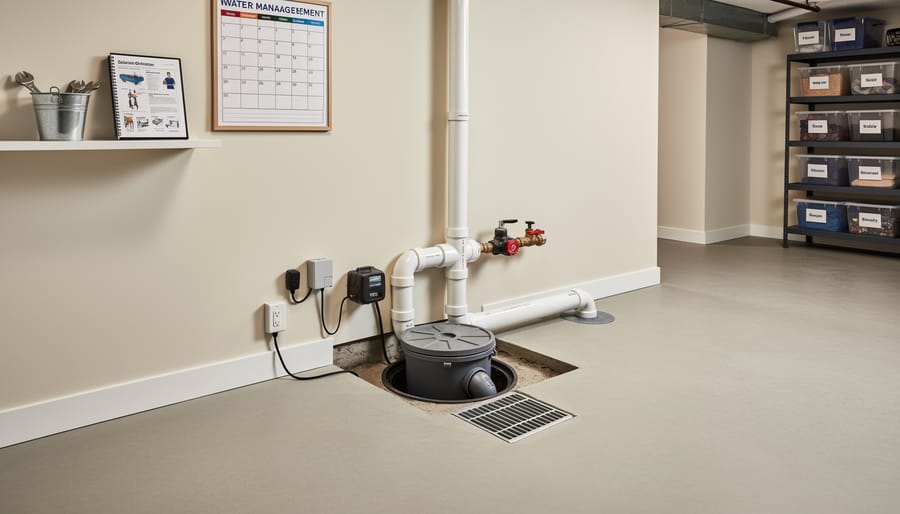
Installing a basement water management system involves serious hazards that demand respect and preparation. Before you begin, understand that you’ll be working in a confined space with electrical components, heavy materials, and potential structural implications. Always shut off power to the basement at your main panel before any excavation work begins, water and electricity create a lethal combination that kills without warning.
Wear safety glasses during all excavation and concrete work, steel-toed boots to protect against dropped tools or materials, and work gloves when handling sharp drainage components. Ottawa’s clay soil can cave in unexpectedly during trenching, so never dig deeper than 18 inches without proper shoring. Ensure adequate ventilation if you’re using any adhesives, sealants, or waterproofing products, basements trap fumes that can cause dizziness or worse.
You should absolutely hire a professional if your project involves moving load-bearing walls, working near gas lines, or if your home was built before 1960 and may have structural quirks. Ottawa requires building permits for most basement waterproofing work that affects your home’s structure or plumbing systems. Contact the City of Ottawa’s Building Code Services before starting to determine if your project needs inspection. A licensed contractor already knows these requirements and carries liability insurance that protects you if something goes wrong. If you’re uncomfortable with any aspect of the work, or if your basement shows signs of serious foundation damage like wide cracks or bowing walls, professional assessment isn’t optional, it’s essential.
Step-by-Step Installation Process
Step 1: Assess Your Basement and Plan the System
Start by examining your basement during and after heavy rain to pinpoint where water enters. Check the floor-wall joint (the cove), foundation cracks, window wells, and utility penetrations. Use a flashlight to inspect for dampness, efflorescence (white mineral deposits), or actual standing water. In Ottawa, spring thaw often reveals issues that remain hidden during drier months.
Measure your basement’s perimeter to calculate how much drainage pipe you’ll need. Note any obstacles like furnaces, water heaters, or electrical panels that affect trench routing. Take photos of problem areas and sketch a basic floor plan showing where water collects.
Determine your lowest point for sump pit placement, typically a corner farthest from utilities. Mark your planned trench path along interior walls, maintaining at least six inches from the foundation footing. If multiple areas show water intrusion, you may need additional branch lines converging at the sump location.
Consider your lot’s grade and soil type. Ottawa’s heavy clay soil drains poorly, often requiring more aggressive systems than sandy soils would need. Identify where you’ll route the discharge line outdoors, ensuring it slopes away from your foundation at least ten feet.
Step 2: Excavate the Perimeter Trench
Dig a trench along the interior perimeter of your basement walls, maintaining consistent dimensions of 12 inches wide and 12 to 18 inches deep below the floor surface. This depth ensures the drainage pipe sits below the slab’s lowest point, allowing gravity to move water toward your sump pit.
Mark your trench line with chalk about 6 inches from the foundation wall. Use a concrete saw to cut through the existing floor along this line, then break up and remove the concrete with a jackhammer. Work in manageable sections, hauling debris out immediately to keep your workspace clear.
Ottawa’s dense clay soil presents a unique challenge. The clay compacts easily and holds water, so you’ll need to dig carefully to maintain clean trench walls. A narrow-bladed shovel works better than a standard spade for this soil type. Remove all clay from the trench bottom, as any remaining material will impede drainage. Expect the excavation to take longer than it would in sandy or loamy soil, and plan for frequent breaks when working through hard-packed layers.
Step 3: Install the Drainage Pipe and Gravel Base
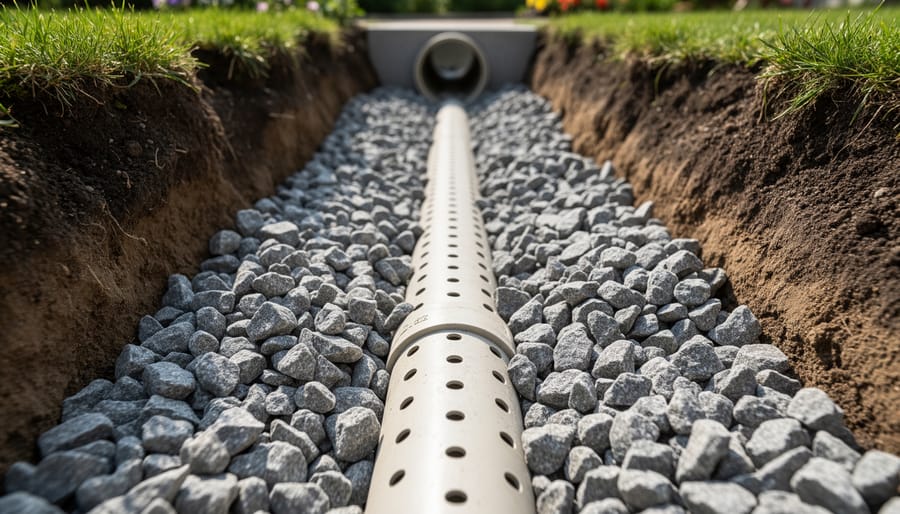
With your trench excavated, you’re ready to install the drainage components that will channel water to your sump pit. Start by creating a stable base: spread a 2-inch layer of ¾-inch clean gravel (also called drainage stone) along the trench bottom. Avoid crushed limestone, which can deteriorate and clog the system.
Lay 4-inch perforated weeping tile with the holes facing down, this prevents sediment from entering while allowing water to drain from the gravel layer. Ottawa’s clay soil makes this orientation critical for longevity. The pipe must slope consistently toward the sump pit at a minimum grade of ⅛ inch per foot, though ¼ inch per foot works better for positive drainage.
Use a level and string line to verify slope throughout. Connect pipe sections with couplings, wrapping joints with filter fabric to prevent gravel intrusion. Once positioned correctly, surround the pipe with 6 to 8 inches of clean gravel on all sides. The gravel acts as a filtration layer and provides pathways for water to reach the perforations.
Compact the gravel lightly by hand to eliminate voids, but don’t crush the pipe.
Step 4: Create the Sump Pit and Install the Pump
The sump pit serves as the collection point where your perimeter drainage system deposits water for removal. In Ottawa basements, position the pit at the lowest point of your drainage run, typically in a corner where it won’t interfere with finished spaces.
Excavate a hole approximately 24 inches deep and 18 inches in diameter using a jackhammer for concrete floors. The pit should extend below your drainage pipe level to allow gravity flow. Insert a perforated plastic liner, available at Home Depot or Lowe’s on Merivale Road, and surround it with gravel to facilitate water entry while keeping soil out.
Select a submersible sump pump rated for your basement size. For most Ottawa homes, a 1/3 horsepower pump handles typical water volumes, but if you have significant seepage or a large footprint, upgrade to 1/2 horsepower. Position the pump on bricks at the pit bottom to prevent debris intake. Connect the discharge pipe using a check valve to prevent backflow. Test the float mechanism by filling the pit with water and confirming the pump activates around 8 to 10 inches of water depth.
Step 5: Route the Discharge Line
The discharge line carries water from your sump pump to a safe distance from your foundation, typically 10 to 15 feet minimum. Run rigid PVC pipe (1.5 or 2 inches) from the pump through your basement wall, angling it slightly downward to prevent water from flowing back. You’ll need to drill through the foundation or run the line through an existing window well.
Outside, extend the pipe away from your house, burying it below Ottawa’s frost line (approximately 4 feet deep) to prevent winter freezing and bursting. Where burial isn’t feasible, use insulated piping or heat tape on above-ground sections. The discharge point should slope away from all structures and drain onto permeable ground, never onto sidewalks, driveways, or neighbouring properties.
Install a check valve near the pump to stop backflow, and add a freeze-prevention valve that releases small amounts of water rather than allowing ice blockages. Many Ottawa homeowners also install a visible discharge extension for summer months to direct water even farther from the foundation during heavy rain periods.
Step 6: Apply Waterproofing Membrane and Vapor Barrier
Once your drainage system is in place and before restoring the floor, you’ll need to protect the foundation walls themselves. Start by cleaning the exposed wall surfaces with a wire brush to remove any loose debris, efflorescence, or old paint. The wall must be completely dry before proceeding.
Apply a hydraulic cement patching compound to fill any cracks or holes in the foundation. For Ottawa basements with concrete block walls, pay special attention to mortar joints where water often penetrates. Allow the patches to cure for at least 24 hours.
Next, roll or brush on a waterproofing membrane designed for interior basement applications. Products like Drylok or similar latex-based sealers work well for most situations. Apply two coats, working from top to bottom, and ensure complete coverage around all pipe penetrations and where the wall meets the floor. This creates a sealed envelope that directs any moisture downward into your newly installed drainage system.
For added protection against humidity, install a 6-mil polyethylene vapor barrier over the waterproofing membrane, overlapping seams by at least six inches and taping them with waterproof tape. This barrier prevents moisture vapor from entering your basement through the foundation walls.
Step 7: Restore the Floor and Final Connections
With the drainage system fully installed and tested, you’re ready to restore your basement floor and complete the electrical connections. Begin by thoroughly cleaning the trench area, removing any debris or loose material that could compromise the new concrete bond. Mix concrete to a slightly thicker consistency than typical, Ottawa’s humidity means slower curing, and you want structural strength.
Pour the concrete in sections, working from the farthest corner toward your exit. Use a straightedge to level it flush with the existing floor, feathering the edges where new meets old. A steel trowel creates a smooth finish that matches your original surface.
For electrical connections, confirm your circuit breaker is off before wiring the pump. Install a dedicated GFCI outlet above flood level, never on the floor where water could reach it. Use weatherproof junction boxes and secure all conduit to the wall. If you’re uncertain about electrical work, hire a licensed electrician; improper wiring near water creates serious shock hazards.
Allow concrete to cure for at least 48 hours before placing heavy items on it. Mark your sump pit location on the floor for future reference.
Testing Your System and Verifying Proper Operation
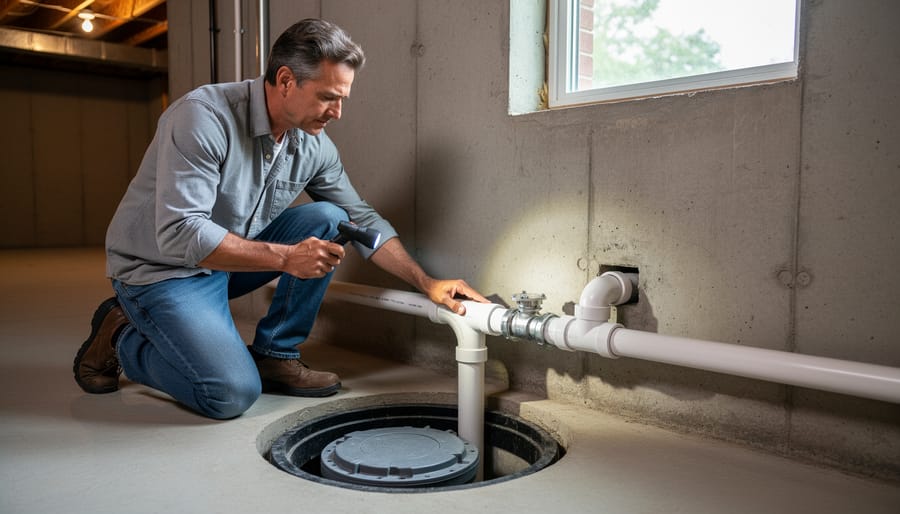
Before your system becomes fully operational, thorough testing prevents expensive water damage down the road. Start with a simple pour test: slowly add five gallons of water into the sump pit while watching the float switch activate and the pump engage. The water level should drop within seconds, and you should hear water flowing through the discharge pipe outside.
Check for proper drainage by running water from a hose at multiple points along your perimeter trench. Water should flow toward the sump pit without pooling anywhere along the drainage path. If you notice standing water in sections of the trench, you likely have inadequate slope or a blockage in the perforated pipe that needs correction before pouring concrete.
During Ottawa’s spring thaw, conduct a real-world stress test by monitoring your system during heavy rainfall or rapid snowmelt. The pump should cycle on and off as needed without running continuously, which indicates either an undersized pump or water entering faster than your system can handle. Watch the check valve on the discharge line to ensure water isn’t flowing backward when the pump shuts off.
Common issues include float switches stuck against the pit wall (ensure three inches of clearance), discharge lines freezing in winter (extend them below the frost line or add heat tape), and pump vibration causing noise (place it on a rubber pad). Establish a maintenance routine every three months: remove debris from the sump basket, pour water in to test pump operation, inspect the check valve for mineral buildup, and verify your backup power source functions if you have a battery system installed.
Common Questions About Basement Water Management Systems
Homeowners considering a basement water management system naturally have questions about the investment, process, and long-term implications. Here are straightforward answers to the most common concerns we hear from Ottawa residents.
What does a complete basement water management system cost in Ottawa?
Expect to invest between $3,000 and $8,000 for a professionally installed system, or $1,200 to $2,500 for a DIY installation if you handle the labour yourself. Costs vary based on basement size, soil conditions, and whether you need additional foundation repairs.
Do I need a permit to install this system in Ottawa?
Generally, interior drainage systems don’t require permits, but installing or modifying electrical circuits for the sump pump does. Contact the City of Ottawa’s building services department to confirm requirements for your specific situation.
How long does installation typically take?
A DIY installation usually takes a dedicated weekend (two to three full days) for an average basement. Professional contractors typically complete the work in one to two days, depending on complexity and concrete curing time.
Will the system work during Ottawa’s harsh winters?
Yes, when properly installed with outdoor discharge lines buried below the frost line (typically 4 feet deep in Ottawa) and equipped with freeze-resistant components. Battery backup systems help maintain protection during winter power outages.
Maintenance requirements are minimal but essential. Test your sump pump quarterly by pouring water into the pit until it activates, and clean the intake screen annually to prevent debris buildup. Spring is particularly important, as snowmelt creates peak demand on your system. Replace the pump every seven to ten years, even if it appears functional, since internal components degrade over time.
Many homeowners wonder about warranty coverage. Quality sump pumps carry five to ten year manufacturer warranties, though they typically don’t cover installation errors or damage from improper maintenance. Some contractors offer workmanship guarantees ranging from one to five years on the installation itself. Keep detailed records of your installation date, component models, and maintenance activities for warranty claims and future reference.
If you experience persistent dampness after installation, the issue might be unrelated to groundwater. High indoor humidity, condensation on cold surfaces, or leaks from plumbing or windows require different solutions than a drainage system addresses.
You may also like
-
Basement Income Suites in Ontario: Permit Rules, Safety Standards, and What Makes a Legal Rental
-
Where to Find Breaking Local News in Ottawa: Top Sources Beyond the Citizen
-
Why Your Next Home Renovation Needs a Licensed Ottawa Plumber First
-
Pro-Grade Cleaning Supplies That Transform Ottawa Homes
-
5 Benefits of Working With a Roofing Company in Ottawa